Hops (Humulus lupulus) are essential for brewing beer, contributing bitterness, aroma, and flavor to your favorite brews. Fortunately, hops can also be grown at home, even by beginners. In this guide, we’ll cover everything you need to know to start growing hops in your own garden.
Table of Contents
- Why Grow Hops?
- Understanding Hop Plants
- Choosing a Hop Variety
- Location and Climate Requirements
- Preparing the Soil
- Planting Hop Rhizomes
- Supporting Hop Bines
- Watering and Feeding
- Pest and Disease Control
- Harvesting Hops
- Drying and Storing Hops
- Common Growing Challenges
- Final Thoughts and Tips
Why Grow Hops?
Growing your own hops allows you to control the quality of ingredients you use for homebrewing or crafting. It’s also a rewarding experience for gardeners, offering a beautiful climbing plant that can enhance any garden. Additionally, hops are perennials, so with proper care, they will come back year after year, making them a long-term investment in your garden.
Understanding Hop Plants
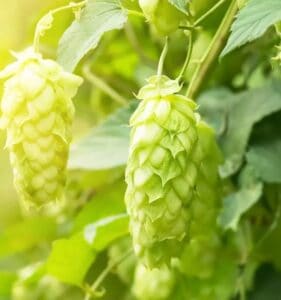
Hops are vigorous climbing plants that can grow up to 20-30 feet in a single season. The key component of hops used in brewing are the hop cones, which are the female flowers of the plant. Hops grow from rhizomes, which are horizontal underground stems that send up shoots.
- Hop Bines vs. Vines: Unlike vines, which cling using tendrils or suckers, hop plants are bines that climb by wrapping around supports with the help of small hairs on their stems.
Choosing a Hop Variety
There are many hop varieties to choose from, and the variety you pick will depend on your climate and brewing preferences. Here are some popular varieties for home gardeners:
- Cascade: A versatile variety with floral, citrus, and spice notes.
- Centennial: Known for its strong aroma, often referred to as “super Cascade.”
- Chinook: Piney, spicy, and slightly fruity hops, good for bittering.
- Fuggle: A traditional English hop with woody and earthy flavors.
For beginners, Cascade is often recommended due to its ease of growth and balanced flavor profile.
Location and Climate Requirements
Hops are best suited for temperate climates with long daylight hours, ideally between 13 and 15 hours of daylight during the growing season. They thrive in USDA zones 4-9.
- Sunlight: Choose a location that gets at least 6-8 hours of direct sunlight daily.
- Space: Since hops grow tall, they need space to climb. A strong vertical support like a trellis, pole, or fence is essential.
- Airflow: Hops need good airflow to prevent diseases, so avoid planting them in tight spaces with poor circulation.
Preparing the Soil
Hops prefer well-drained, nutrient-rich soil with a pH between 6.0 and 7.5.
- Soil Preparation: Loosen the soil to a depth of about 12-16 inches. Amend it with organic matter like compost to ensure adequate drainage and nutrients.
- Mulching: Applying mulch can help retain moisture and regulate soil temperature, especially in the first few months after planting.
Planting Hop Rhizomes
Hop plants are grown from rhizomes, which are sections of the plant’s root system. You can buy rhizomes from garden centers or online during early spring.
- Planting Time: Plant rhizomes in early spring after the danger of frost has passed.
- Planting Depth: Dig a trench about 4-6 inches deep. Place the rhizome horizontally, with buds facing up, and cover lightly with soil.
- Spacing: Space rhizomes at least 3-5 feet apart to give them enough room to grow.
Supporting Hop Bines
As hops grow, they need a strong structure to climb. Hop bines can reach heights of 20 feet or more, so you’ll need a tall support system.
- Trellises and Poles: Use sturdy poles, fences, or trellises. Commercial growers often use tall poles with twine running down to the plants.
- Training the Bines: Once the shoots are about 1-2 feet tall, begin training them to wrap around the support in a clockwise direction. Continue training the shoots throughout the growing season.
Watering and Feeding
Hops need plenty of water, especially during the hot summer months.
- Watering: Keep the soil consistently moist but not waterlogged. Water deeply 2-3 times a week, depending on the climate and rainfall.
- Fertilizing: Use a balanced fertilizer with an NPK ratio of about 5-10-5 to promote root and flower development. Fertilize at planting and again mid-season.
Pest and Disease Control
While hops are relatively hardy, they can still fall prey to pests and diseases.
- Common Pests: Aphids, spider mites, and hop flea beetles can affect hop plants. Use insecticidal soap or neem oil to control infestations.
- Diseases: Powdery mildew and downy mildew are the most common fungal diseases affecting hops. To prevent them:
- Ensure proper spacing and airflow.
- Water the base of the plant to keep leaves dry.
- Consider using fungicides if conditions are wet and humid.
Harvesting Hops
Hops are ready to harvest when the cones feel “papery” and spring back when lightly squeezed. They usually ripen between late summer and early fall.
- Smell Test: Ripe hop cones will have a strong aroma, and the lupulin (yellow powder inside the cones) will be sticky and fragrant.
- Harvesting: Use scissors or pruners to cut down the cones. Avoid pulling them off to prevent damaging the plant.
Drying and Storing Hops
After harvesting, hops need to be dried to preserve their flavor and prevent mold growth.
- Drying: Spread the cones in a single layer on a screen or mesh in a dry, well-ventilated area. Dry them until they are papery and brittle, which usually takes 2-3 days.
- Storing: Once dry, store the hops in airtight containers, preferably vacuum-sealed, and keep them in the freezer to preserve their potency.
Common Growing Challenges
Even with careful attention, you may face some challenges while growing hops:
- Yellowing Leaves: This could be a sign of over watering, nutrient deficiency, or pests like aphids.
- Bines Not Climbing: Ensure the supports are tall and sturdy. Bines need to be manually trained to wrap around supports early in the season.
- Slow Growth: If growth is sluggish, check the soil pH, sunlight exposure, and water levels. It might also be due to poor soil fertility.
Final Thoughts and Tips
Growing hops is an enjoyable and rewarding endeavor, especially for home brewers. Here are some final tips:
- Be patient—hops may take 1-2 years to reach full production.
- Ensure they have enough vertical space to climb.
- Start small with a few rhizomes, and expand your hop yard once you gain confidence.
With proper care, your hops will thrive and provide you with fresh, aromatic cones for many years and beers to come!